Workshop Projects - DIY Table Saw
Last year I decided to try and build a table saw, I had never used a table saw before but it always seemed like one of the most useful workshop tools to have. As a starting point I used one of Matthias Wandel's designs, this was really usefull for finding a way to reliably mount the saw.
Circular Saw
The build started with a circular saw, I ended up getting the cheapest one available on Amazon with a non awful review and that was a Vonhaus saw.
I started by removing the base plate and other unneeded bits and pieces, this left me with the metal guard which covers one half of the blade.
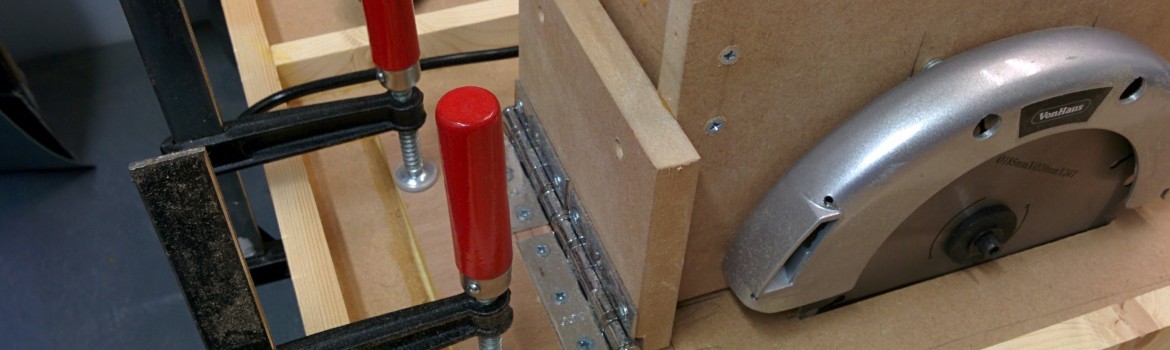
Mounting the saw
I started by following Matthias' build and making a frame around the saw, this was a strong rigid frame mounted to the blade guard that I could then use to attach to the rest of the table saw. There is only one piece of MDF bolted to the saw, the other parts form a snug fit around the rest of the saw. At one end there is a flat plate which will be where the hinge attaches to the base.
The Base
The base is a small sheet of 3/4" MDF which has been reinforced with batons around the edge and also further internal cross bracing. I built the main sections over a week so I would glue and clamp the various parts and then when they were dry put some screws in.
Attaching The Saw
Attaching the saw to the base is one of the bigger moments as it fairly important to get it straight, I didn't and was able to correct this but it's far better if you can get the blade lined up straight. I used normal door hinges for the pivot, I did try out a couple of sets until I found some with the smallest amount of play, this is important as if the saw wobbles there wont be any accuracy to the cuts.
Depth Adjustment
To control the height of the blade I attached a piece of wood alongside the moving saw with a slot cut in for a bolt to ride through, this way the height can be altered by loosening the wing nut and raising or lowering the saw.
Miter Slots
I hadn't used a table saw before but I did know I wanted to use a sled with it, these seemed like a really good way to make a potentially dangerous table saw quite safe and to work with small pieces of wood. In order to use a sled I needed to cut some slots.
This is the moment where it is critical to get everything perfectly aligned, once again I failed with this but thankfully only partially.
I started by buying some strip wood that would run in the guide rail, this determined the width of the slot I needed to cut. I then clamped some wooden rails down and attempted to get them perfectly aligned with the saw blade, I could then use a router to cut a channel in the wooden surface.
Crosscut Sled
The sled is really simple but it was at this point that I found out that my miter slots weren't quite right, the right hand slot was about half a millimeter out at the back which meant the sled started to bind as it was pushed back. Thankfully you only need one guide so I removed the second strip of wood from the sled and I have been working with only the left hand slot ever since.
Finishing Off
I finished the saw above about 8 months ago and I have been using it ever since but its been sat on folding saw horses ever since, this weekend I finally made a base for it and attached some casters, I can now easily move it around and shift it out the way when I don't need it.
This was a very successful build and has proved extremely useful, I never made a very reliable fence for it so I tend to just use it with the sled but this isn't much of a problem. I have gotten so used to it my worry now is that the saw will give out and because it was built around it the whole thing will need to be scrapped!